Ravenloft AD&D Miniatures by Ral Partha: Difference between revisions
From Mistipedia
Jump to navigationJump to search
| Line 68: | Line 68: | ||
<gallery> | <gallery> | ||
image:11-100 Greater Wolfwere - Wolf Hybrid, Male and Female Forms.jpg|<center>11-100<br>Greater Wolfweres | image:11-100 Greater Wolfwere - Wolf Hybrid, Male and Female Forms.jpg|<center>11-100<br>Greater Wolfweres | ||
image:11-100 Greater Wolfwere - Wolf Hybrid, Male and Female Forms.jpg|<center>11-100<br>Greater Wolfwere | |||
image:11-100 Greater Wolfwere - Wolf Hybrid, Male and Female Forms.jpg|<center>11-100<br>Wolfwere Male Form | |||
image:11-100 Greater Wolfwere - Wolf Hybrid, Male and Female Forms.jpg|<center>11-100<br>Wolfwere Female Form | |||
image:11-100 Greater Wolfwere - Wolf Hybrid, Male and Female Forms.jpg|<center>11-100<br>Wolf Hybrid | |||
image:11-101 Werebat - Batlord's Human and Hybrid forms and Lackey.jpg|<center>11-101<br>Werebat | image:11-101 Werebat - Batlord's Human and Hybrid forms and Lackey.jpg|<center>11-101<br>Werebat | ||
image:11-101 Werebat - Batlord's Human and Hybrid forms and Lackey.jpg|<center>11-101<br>Werebat Lord | |||
image:11-101 Werebat - Batlord's Human and Hybrid forms and Lackey.jpg|<center>11-101<br>Werebat 1 | |||
image:11-101 Werebat - Batlord's Human and Hybrid forms and Lackey.jpg|<center>11-101<br>Werebat 2 | |||
image:11-102 Greater Mummy - Queen, Mummy Lord & Servants.jpg|<center>11-102<br>Greater Mummy | image:11-102 Greater Mummy - Queen, Mummy Lord & Servants.jpg|<center>11-102<br>Greater Mummy | ||
image:11-103 Demi-human Vampires.jpg|<center>11-103<br>Demihuman Vampires<br> | image:11-102 Greater Mummy - Queen, Mummy Lord & Servants.jpg|<center>11-102<br>Queen | ||
image:11-104 Vampyres.jpg|<center>11-104<br>Vampyres | image:11-102 Greater Mummy - Queen, Mummy Lord & Servants.jpg|<center>11-102<br>Mummy Lord | ||
image:11-105 Village Mob.jpg|<center>11-105<br>Village Mob | image:11-102 Greater Mummy - Queen, Mummy Lord & Servants.jpg|<center>11-102<br>Servant 1 | ||
image:11-106 Village Personalities.jpg|<center>11-106<br>Village Personalities<br> | image:11-102 Greater Mummy - Queen, Mummy Lord & Servants.jpg|<center>11-102<br>Servant 2 | ||
image:11-107 Goblyns.jpg|<center>11-107<br>Goblyns | image:11-103 Demi-human Vampires.jpg|<center>11-103<br>Demihuman Vampires 3pcs<br> | ||
image:11-103 Demi-human Vampires.jpg|<center>11-103<br>Demihuman Vampire Dwarf | |||
image:11-103 Demi-human Vampires.jpg|<center>11-103<br>Demihuman Vampire Halfling | |||
image:11-103 Demi-human Vampires.jpg|<center>11-103<br>Demihuman Vampire Elf | |||
image:11-104 Vampyres.jpg|<center>11-104<br>Vampyres 3pcs | |||
image:11-104 Vampyres.jpg|<center>11-104<br>Vampyres Male | |||
image:11-104 Vampyres.jpg|<center>11-104<br>Vampyres Female 1 | |||
image:11-104 Vampyres.jpg|<center>11-104<br>Vampyres Female 2 | |||
image:11-105 Village Mob.jpg|<center>11-105<br>Village Mob 7pcs | |||
image:11-105 Village Mob.jpg|<center>11-105<br>Village Mob Leader | |||
image:11-105 Village Mob.jpg|<center>11-105<br>Village Mob Villager 1 | |||
image:11-105 Village Mob.jpg|<center>11-105<br>Village Mob Villager 2 | |||
image:11-105 Village Mob.jpg|<center>11-105<br>Village Mob Villager 3 | |||
image:11-106 Village Personalities.jpg|<center>11-106<br>Village Personalities<br>4pcs | |||
image:11-106 Village Personalities.jpg|<center>11-106<br>Village Personalities<br>The Burgomeister | |||
image:11-106 Village Personalities.jpg|<center>11-106<br>Village Personalities<br>The Doctor | |||
image:11-106 Village Personalities.jpg|<center>11-106<br>Village Personalities<br>Barmaiden | |||
image:11-106 Village Personalities.jpg|<center>11-106<br>Village Personalities<br>Thug | |||
image:11-107 Goblyns.jpg|<center>11-107<br>Goblyns 3pcs | |||
image:11-107 Goblyns.jpg|<center>11-107<br>Goblyn 1 | |||
image:11-107 Goblyns.jpg|<center>11-107<br>Goblyn 2 | |||
image:11-107 Goblyns.jpg|<center>11-107<br>Goblyn 3 | |||
image:11-108 Great White Stag.jpg|<center>11-108<br>Great White Stag | image:11-108 Great White Stag.jpg|<center>11-108<br>Great White Stag | ||
image:11-109 Gypsies.jpg|<center>11-109<br>Gypsies | image:11-109 Gypsies.jpg|<center>11-109<br>Gypsies 3pcs | ||
image:11-110 Gypsy Dancers.jpg|<center>11-110<br>Gypsy Dancers | image:11-109 Gypsies.jpg|<center>11-109<br>Gypsy 1 | ||
image:11-109 Gypsies.jpg|<center>11-109<br>Gypsy 2 | |||
image:11-109 Gypsies.jpg|<center>11-109<br>Gypsy 3 | |||
image:11-110 Gypsy Dancers.jpg|<center>11-110<br>Gypsy Dancers 3pcs | |||
image:11-110 Gypsy Dancers.jpg|<center>11-110<br>Gypsy Dancer 1 | |||
image:11-110 Gypsy Dancers.jpg|<center>11-110<br>Gypsy Dancer 2 | |||
image:11-110 Gypsy Dancers.jpg|<center>11-110<br>Gypsy Dancer 3 | |||
image:11-111 Lords of Ravenloft - Vlad Drakov, Strahd von Zarovich & Gabrielle Aderre.jpg|<center>11-111<br>Lords of Ravenloft | image:11-111 Lords of Ravenloft - Vlad Drakov, Strahd von Zarovich & Gabrielle Aderre.jpg|<center>11-111<br>Lords of Ravenloft | ||
image:11-111 Lords of Ravenloft - Vlad Drakov, Strahd von Zarovich & Gabrielle Aderre.jpg|<center>11-111<br>Lords of Ravenloft<br>Vlad Drakov | |||
image:11-111 Lords of Ravenloft - Vlad Drakov, Strahd von Zarovich & Gabrielle Aderre.jpg|<center>11-111<br>Lords of Ravenloft<br>Strahd von Zarovich | |||
image:11-111 Lords of Ravenloft - Vlad Drakov, Strahd von Zarovich & Gabrielle Aderre.jpg|<center>11-111<br>Lords of Ravenloft<br>Gabrielle Aderre | |||
image:11-112 Vampire Hunters.jpg|<center>11-112<br>Vampire Hunters | image:11-112 Vampire Hunters.jpg|<center>11-112<br>Vampire Hunters | ||
image:11-113 Lost Ones.jpg|<center>11-113<br>The Lost Ones | image:11-112 Vampire Hunters.jpg|<center>11-112<br>Vampire Hunters<br>Rudolph Van Richten | ||
image:11-114 Wolfweres - Male, Female, Hybrid & Victim.jpg|<center>11-114<br>Wolfweres | image:11-112 Vampire Hunters.jpg|<center>11-112<br>Vampire Hunters<br>Tara Kolyana | ||
image:11-112 Vampire Hunters.jpg|<center>11-112<br>Vampire Hunters<br>Gondegal | |||
image:11-113 Lost Ones.jpg|<center>11-113<br>The Lost Ones 3pcs | |||
image:11-113 Lost Ones.jpg|<center>11-113<br>The Lost Ones 1 | |||
image:11-113 Lost Ones.jpg|<center>11-113<br>The Lost Ones 2 | |||
image:11-113 Lost Ones.jpg|<center>11-113<br>The Lost Ones 3 | |||
image:11-114 Wolfweres - Male, Female, Hybrid & Victim.jpg|<center>11-114<br>Wolfweres 4pcs | |||
image:11-114 Wolfweres - Male, Female, Hybrid & Victim.jpg|<center>11-114<br>Wolfweres Male Form | |||
image:11-114 Wolfweres - Male, Female, Hybrid & Victim.jpg|<center>11-114<br>Wolfweres Female Form | |||
image:11-114 Wolfweres - Male, Female, Hybrid & Victim.jpg|<center>11-114<br>Wolfweres Hybrid & Victim | |||
image:11-115 Zombie Lord & Lackeys.jpg|<center>11-115<br>Zombie Lord and Lackeys | image:11-115 Zombie Lord & Lackeys.jpg|<center>11-115<br>Zombie Lord and Lackeys | ||
image:11-115 Zombie Lord & Lackeys.jpg|<center>11-115<br>Zombie Lord and Lackeys<br>Zombie Lord | |||
image:11-115 Zombie Lord & Lackeys.jpg|<center>11-115<br>Zombie Lord and Lackeys<br>Lackey Male | |||
image:11-115 Zombie Lord & Lackeys.jpg|<center>11-115<br>Zombie Lord and Lackeys<br>Lackey Female | |||
image:11-116 Ratk Ubel.jpg|<center>11-116<br>Ratik Ubel | image:11-116 Ratk Ubel.jpg|<center>11-116<br>Ratik Ubel | ||
image:11-117 Man Wolf.jpg|<center>11-117<br>Man Wolf | image:11-117 Man Wolf.jpg|<center>11-117<br>Man Wolf | ||
image:11-118 Natalia Vorshkova.jpg|<center>11-118<br>Natalia Vorshkova | image:11-118 Natalia Vorshkova.jpg|<center>11-118<br>Natalia Vorshkova | ||
image:11-0119 Vampires Orlok, Bellac Gordol and Female.jpg|<center>11-119<br>Vampires | image:11-0119 Vampires Orlok, Bellac Gordol and Female.jpg|<center>11-119<br>Vampires 3 pcs | ||
image:11-0119 Vampires Orlok, Bellac Gordol and Female.jpg|<center>11-119<br>Vampires<br>Orlok | |||
image:11-0119 Vampires Orlok, Bellac Gordol and Female.jpg|<center>11-119<br>Vampires<br>Bellac Gordol | |||
image:11-0119 Vampires Orlok, Bellac Gordol and Female.jpg|<center>11-119<br>Vampires<br>Female Vampire | |||
image:11-120 Lab Work Tables and Labware.jpg|<center>11-120<br>Lab Work Tables and Labware | image:11-120 Lab Work Tables and Labware.jpg|<center>11-120<br>Lab Work Tables and Labware | ||
image:11-121 Assorted Life Energizers.jpg|<center>11-121<br>Assorted Life Energizers | image:11-121 Assorted Life Energizers.jpg|<center>11-121<br>Assorted Life Energizers | ||
| Line 92: | Line 144: | ||
image:11-123 Ivana Boritsi.jpg|<center>11-123<br>Ivana Boritsi | image:11-123 Ivana Boritsi.jpg|<center>11-123<br>Ivana Boritsi | ||
image:11-124 Alfred Timothy.jpg|<center>11-124<br>Alfred Timothy | image:11-124 Alfred Timothy.jpg|<center>11-124<br>Alfred Timothy | ||
image:11-125 Witches.jpg|<center>11-125<br>Witches | image:11-125 Witches.jpg|<center>11-125<br>Witches 3pcs | ||
image:11-125 Witches.jpg|<center>11-125<br>Witches<br>The Crone | |||
image:11-125 Witches.jpg|<center>11-125<br>Witches<br>The Mother | |||
image:11-125 Witches.jpg|<center>11-125<br>Witches<br>The Maiden | |||
</gallery> | </gallery> | ||
[[Category:Miniature]] | [[Category:Miniature]] | ||
Revision as of 21:17, 6 March 2010
10-511 Ravenloft: Denizens
Sculptor: Dennis Mize
-
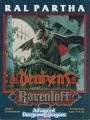
Box Cover -
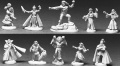
Catalog Scan -
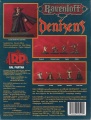
Box Back -
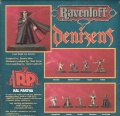
Back Close-up -
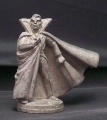
Count Strahd Von Zarovich -
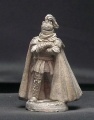
Lord Soth -
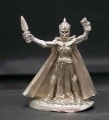
Azalin -
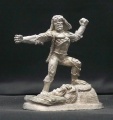
Adam -
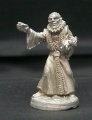
Hazlik -
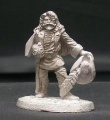
Harkon Lukas -
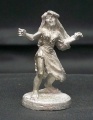
Damsel -
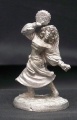
Gypsy -
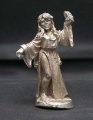
Vampiress -
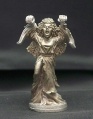
Banshee


10-515 Ravenloft: Castle Forlorn
Sculptor: Dennis Mize
-
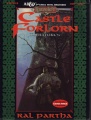
Box Cover -
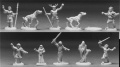
Catalog Scan -
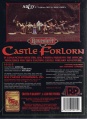
Box Back -
Back Close-up -

Mark ApBlanc -

Tristen ApBlanc -

Morholt ApBlanc -

Rual -

Maeve the Druid -

Shelaugh the Druid -
The Ghost -

Herrd of Clan ApKie -

Wild Huntsman and The Hounds


10-517 Ravenloft: Mordenheim's Lab
Sculptors: Jeff Wilhelm, Dennis Mize
-
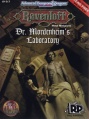
Box Cover -
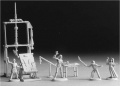
Catalog Scan -
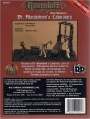
Box Back -
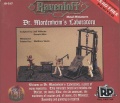
Back Close up -
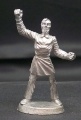
Dr. Mordenheim -
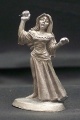
The Lovely Elise -
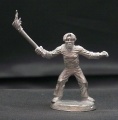
Lab Assistant Horg -
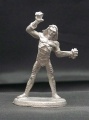
The Monster Adam


11-100 Ravenloft: Blister Pack
Sculptors: Dennis Mize
-
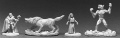
11-100
Greater Wolfweres -
11-100
Greater Wolfwere -
11-100
Wolfwere Male Form -
11-100
Wolfwere Female Form -
11-100
Wolf Hybrid -
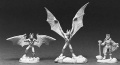
11-101
Werebat -
11-101
Werebat Lord -
11-101
Werebat 1 -
11-101
Werebat 2 -
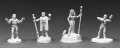
11-102
Greater Mummy -
11-102
Queen -
11-102
Mummy Lord -
11-102
Servant 1 -
11-102
Servant 2 -
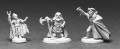
11-103
Demihuman Vampires 3pcs -
11-103
Demihuman Vampire Dwarf -
11-103
Demihuman Vampire Halfling -
11-103
Demihuman Vampire Elf -
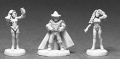
11-104
Vampyres 3pcs -
11-104
Vampyres Male -
11-104
Vampyres Female 1 -
11-104
Vampyres Female 2 -
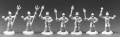
11-105
Village Mob 7pcs -
11-105
Village Mob Leader -
11-105
Village Mob Villager 1 -
11-105
Village Mob Villager 2 -
11-105
Village Mob Villager 3 -
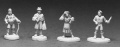
11-106
Village Personalities
4pcs -
11-106
Village Personalities
The Burgomeister -
11-106
Village Personalities
The Doctor -
11-106
Village Personalities
Barmaiden -
11-106
Village Personalities
Thug -
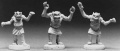
11-107
Goblyns 3pcs -
11-107
Goblyn 1 -
11-107
Goblyn 2 -
11-107
Goblyn 3 -
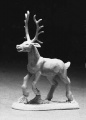
11-108
Great White Stag -
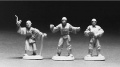
11-109
Gypsies 3pcs -
11-109
Gypsy 1 -
11-109
Gypsy 2 -
11-109
Gypsy 3 -
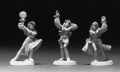
11-110
Gypsy Dancers 3pcs -
11-110
Gypsy Dancer 1 -
11-110
Gypsy Dancer 2 -
11-110
Gypsy Dancer 3 -
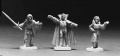
11-111
Lords of Ravenloft -
11-111
Lords of Ravenloft
Vlad Drakov -
11-111
Lords of Ravenloft
Strahd von Zarovich -
11-111
Lords of Ravenloft
Gabrielle Aderre -
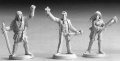
11-112
Vampire Hunters -
11-112
Vampire Hunters
Rudolph Van Richten -
11-112
Vampire Hunters
Tara Kolyana -
11-112
Vampire Hunters
Gondegal -
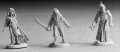
11-113
The Lost Ones 3pcs -
11-113
The Lost Ones 1 -
11-113
The Lost Ones 2 -
11-113
The Lost Ones 3 -
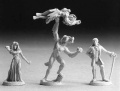
11-114
Wolfweres 4pcs -
11-114
Wolfweres Male Form -
11-114
Wolfweres Female Form -
11-114
Wolfweres Hybrid & Victim -
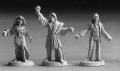
11-115
Zombie Lord and Lackeys -
11-115
Zombie Lord and Lackeys
Zombie Lord -
11-115
Zombie Lord and Lackeys
Lackey Male -
11-115
Zombie Lord and Lackeys
Lackey Female -

11-116
Ratik Ubel -

11-117
Man Wolf -
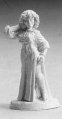
11-118
Natalia Vorshkova -
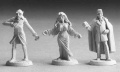
11-119
Vampires 3 pcs -
11-119
Vampires
Orlok -
11-119
Vampires
Bellac Gordol -
11-119
Vampires
Female Vampire -
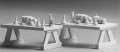
11-120
Lab Work Tables and Labware -
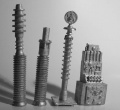
11-121
Assorted Life Energizers -

11-122
Frantisek Markov -

11-123
Ivana Boritsi -
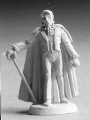
11-124
Alfred Timothy -
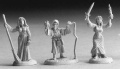
11-125
Witches 3pcs -
11-125
Witches
The Crone -
11-125
Witches
The Mother -
11-125
Witches
The Maiden


